QEMU i440fx 中断拦截设计

续集来了,QEMU i440fx 中断拦截设计 (外设中断)。上次我们介绍了 qemu edu 驱动的编写过程,这里我们来介绍一下如何拦截 i440fx 的中断拦截 (tcg 加速下)。

这里在 qemu 8.1.2 的基础上进行了修改,实现了一个简单的中断拦截服务,通过 tcp 接受外面的指令来决定是否拦截对应的中断。

题外话:气死了,校园网认证老是掉,本来应该 22 号写完的文章愣是拖到 24 号。花了两天现学 rust 搓了个校园网认证客户端丢路由器上了。 项目:srun-cli-client 写个定时任务自动检测重登就好啦~

环境

该拦截仅适用于 Linux 操作系统的宿主机 (因为服务直接使用了 epoll,并没有直接使用 qemu 的 iothread ),并且仅在 tcg 加速下完成测试,没有测试 kvm,但是理论上是可以的。

强烈建议安装 pwndbg 来提高调试体验

当时是做的 5.2.0 还没有 eBPF,不知道用 eBPF 是否更有搞头

  • qemu 8.1.2
  • 一个简单的虚拟机,这里我们使用了前一篇文章形成的 bzImageinitramfs.cpio.gz
  • 完善的构筑环境

获取源码并编译一个初版

老样子,我们拉最新的源码。

1
2
3
wget https://download.qemu.org/qemu-8.1.2.tar.xz
tar -xvf qemu-8.1.2.tar.xz
ls

加上之前做的内核,现在的目录大概长这样:

1
2
3
4
5
6
7
total 124156
drwxr-xr-x 3 spartaen spartaen 4096 Nov 21 21:44 .
drwx------ 43 spartaen spartaen 4096 Nov 22 11:56 ..
-rw-r--r-- 1 spartaen spartaen 1977424 Nov 20 23:24 bzImage
-rw-r--r-- 1 spartaen spartaen 1589182 Nov 21 17:31 initramfs.cpio.gz
drwxr-xr-x 60 spartaen spartaen 4096 Oct 17 01:57 qemu-8.1.2
-rw-r--r-- 1 spartaen spartaen 123553328 Oct 17 04:04 qemu-8.1.2.tar.xz

老样子,写个启动脚本来方便我们后续的工作,创建一个run.sh

1
2
3
4
5
6
7
8
9
10
11
12
13
14
15
16
17
18
19
20
21
22
23
24
25
26
27
28
29
30
31
32
33
34
35
36
37
38
39
40
41
42
43
44
45
46
47
48
49
50
51
52
53
54
55
56
57
58
59
60
61
62
63
64
65
66
67
68
69
70
71
72
73
74
75
#!/bin/bash
# 启用 debug,只编译 x86_64-softmmu 就 OK
CONFIGURE_ARGS="--enable-debug --target-list=x86_64-softmmu"
QEMU_ARGS=("-no-reboot" "-nographic" "-kernel" "./bzImage" "-initrd" "initramfs.cpio.gz" "-machine" "accel=tcg" "-device" "edu" "-append" "earlyprintk=serial,ttyS0 console=ttyS0 loglevel=3 oops=panic panic=1")

set -e

usage() {
echo "Usage: $0 [options]"
echo "Options:"
echo " -d, --debug Enable debug mode"
echo " -r, --reconfig Reconfigure qemu"
echo " -c, --clean Clean build directory"
echo " -b, --build Build qemu"
}

# Parse arguments
while [ $# -gt 0 ]; do
case "$1" in
-d|--debug)
DEBUG=1
;;
-r|--reconfig)
RECONFIG=1
;;
-c|--clean)
CLEAN=1
;;
-b|--build)
BUILD=1
;;
-h|--help)
usage
exit 0
;;
*)
echo "Unknown option: $1"
usage
exit 1
;;
esac
shift
done

pushd qemu-8.1.2

if [ -n "$CLEAN" ]; then
rm -rf build
mkdir build
RECONFIG=1
fi

pushd build

if [ -n "$RECONFIG" ]; then
echo "Configuring qemu"
../configure --prefix=$(pwd)/build $CONFIGURE_ARGS
BUILD=1
fi

if [ -n "$BUILD" ]; then
echo "Building qemu"
make -j$(nproc)
fi

popd
popd

if [ -n "$DEBUG" ]; then
echo "Starting qemu in debug mode"
gdb --args qemu-8.1.2/build/x86_64-softmmu/qemu-system-x86_64 "${QEMU_ARGS[@]}"
else
echo "Starting qemu"
qemu-8.1.2/build/x86_64-softmmu/qemu-system-x86_64 "${QEMU_ARGS[@]}"
fi

我们可以通过 ./run.sh 来启动 qemu,并通过增加参数来决定该从哪一步开始重新构筑 qemu。

参数 作用
-d, –debug 使用 gdb 启动qemu
-r, –reconfig 重新配置并编译 qemu
-c, –clean 清理编译目录并重新配置编译
-b, –build 重新编译 qemu

中断的实现

拦截中断首先要明白中断是怎么实现的,我们以 edu 设备为例,将从中断源、中断的传递、中断的处理三个方面来介绍。

我十分推荐直接通过 gdb 结合源码分析的方式来理解中断的实现,在接下来的内容中我也是这么做的

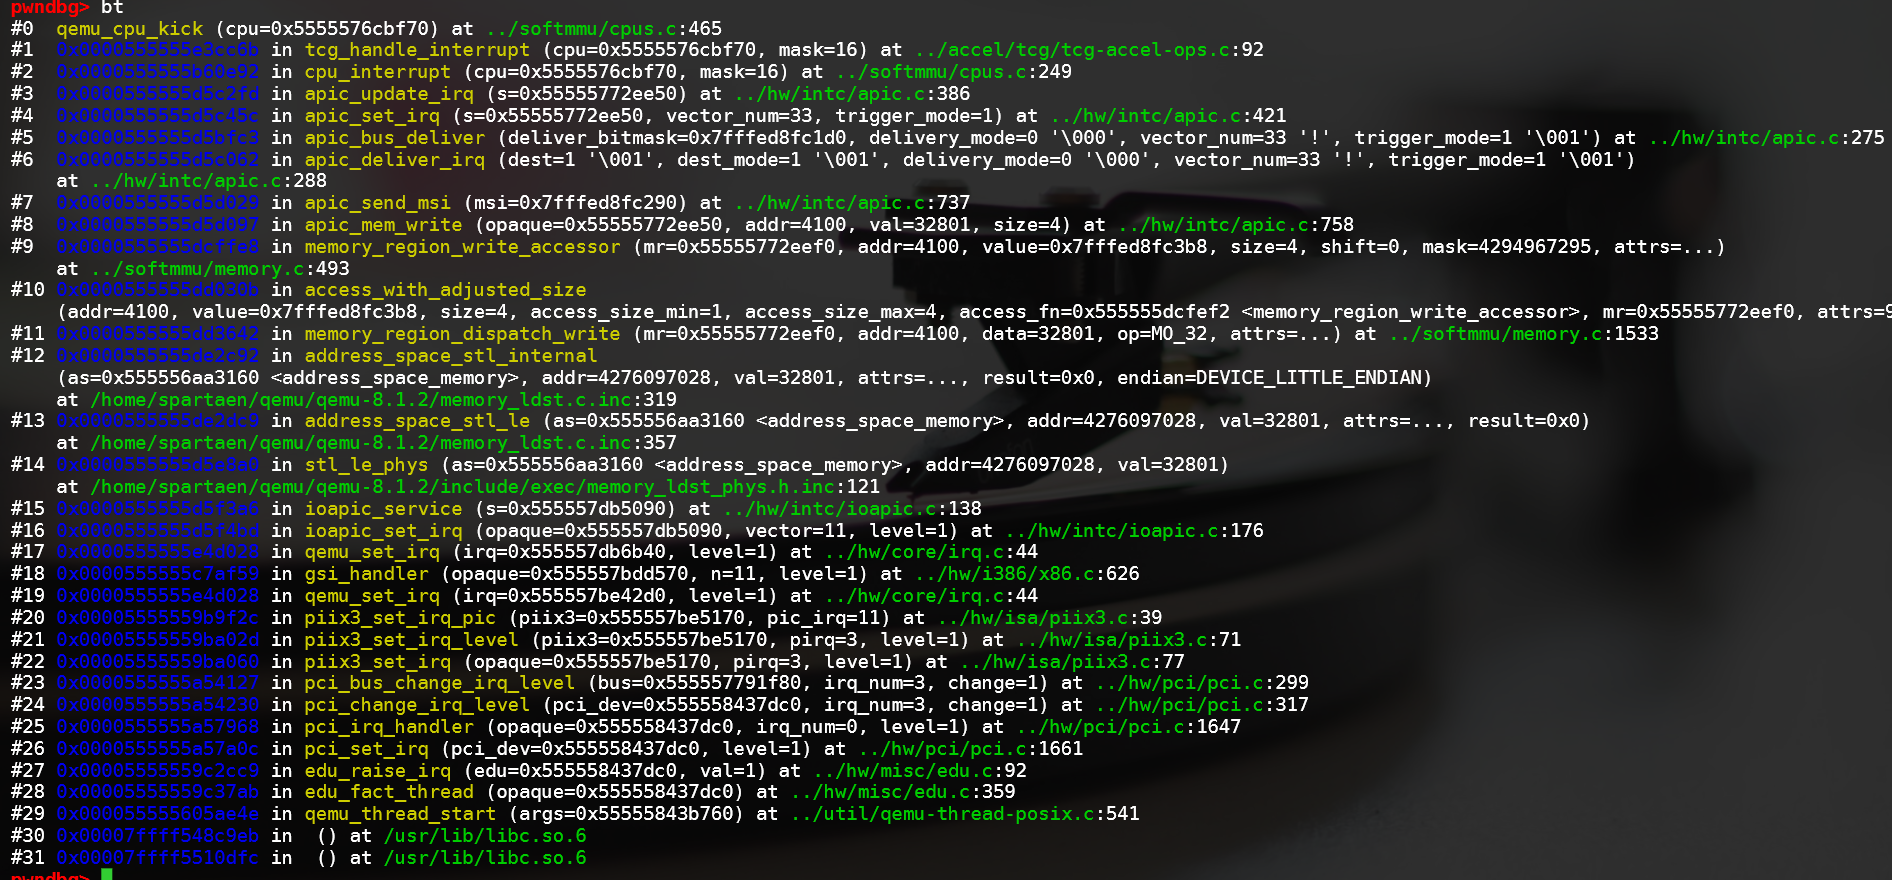
首先我们看一下对应的 callstack
中断源

直接上 edu.c 的源码:

1
2
3
4
5
6
7
8
9
10
11
static void edu_raise_irq(EduState *edu, uint32_t val)
{
edu->irq_status |= val;
if (edu->irq_status) {
if (edu_msi_enabled(edu)) {
msi_notify(&edu->pdev, 0);
} else {
pci_set_irq(&edu->pdev, 1);
}
}
}

我们可以看到,中断源的触发是通过 pci_set_irq 来实现的,但也有通过 msi (message signal interrupt) 来实现的,但我们使用的平台为 i440fx,是不支持 msi 的,所以我们只需要关注 pci_set_irq 即可。

这里我们可以使用 gdb 来进行验证,使用 ./run.sh -d 启用 gdb 使用 b msi_notifymsi_notify 打个断点,我们发现无论我们怎么操作,这个都是不触发的。当我们在 qemu 的启动参数中加入 -M q35 使用 Q35 而不是 i440fx 时,msi_notify 的断点就被触发了。

中断的传递

我们看到了上面频繁出现了 qemu_set_irq,不妨来看看其代码:

1
2
3
4
5
6
7
void qemu_set_irq(qemu_irq irq, int level)
{
if (!irq)
return;

irq->handler(irq->opaque, irq->n, level);
}

很明显,调用了函数指针,后面的 level 为模拟的电信号的状态(0或1)。

而这个qemu_irq的结构体为:

1
2
3
4
5
6
struct IRQState {
Object parent_obj;
qemu_irq_handler handler;
void *opaque;
int n;
};

注意: 这里的实现为 QEMU 对 i440fx 的实现,可能与实际情况存在偏差,我没有去做验证

我们只看代码是很难看出来的,因为里面是大量的函数指针,我们不妨再看一下刚才的 callstack,我们可以大概看到这个中断是怎么传递的:

  1. 首先 PCI 设备调用 pci_set_irq,“告诉” PCI 总线,我有中断了
  2. PCI 总线按照源设备的中断号,调用 qemu_set_irq,“告诉” ISA 总线,有一个中断号为 xx 的中断触发了
  3. ISA 总线按照中断号,调用 qemu_set_irq,“告诉” 中断控制器,有一个中断号为 xx 的中断触发了
  4. 这里问题来了,在中断控制器与 isa 之间连了一个 gsi_handler 的函数,这里他做了一个路由
  • 如果中断号在 i8259 的处理范围内,则先发给 i8259,再发给 ioapic,但实际上 i8259 后面还会连到 ioapic
  • 若中断号超出了 i8259 的处理范围,但在 ioapic 的范围内,则直接发给 ioapic
  • 若中断号超过了一个 ioapic,则发给第二个 ioapic
  • 在 qemu 5.2.0 的时候,只有一个 ioapic,这个函数的逻辑也相对简单一些
  1. 通过中断控制器的处理后,中断会被写入 CPU 的状态中 (CPUState 结构体)

中断的处理

QEMU tcg 处理方式为将代码分块进行翻译,每翻译执行完一块代码后就会看一眼是否有中断需要处理,有就处理中断。具体代码,我们可以看一下 cpu_exec_loop,这里我们不做讨论。accel/tcg/cpu-exec.c:cpu_exec_loop

感兴趣的小伙伴可以参考 https://airbus-seclab.github.io/qemu_blog/tcg_p1.html

中断拦截的实现

拦截点的选取

为了保证能够拦截到所有外设到 CPU 的中断,我们需要在中断传递的每一个环节都进行拦截,那么我们就需要去寻找拦截点了。

那么在哪边能找到所有中断呢?很显然,我们直接杀进 CPU,可以找到 do_interrupt_all 函数,target/i386/tcg/seg_helper.c:do_interrupt_all,在这个函数里我们甚至能找到 qemu 的 中断日志相关的实现:

1
2
3
4
5
6
7
qemu_log("%6d: v=%02x e=%04x i=%d cpl=%d IP=%04x:" TARGET_FMT_lx
" pc=" TARGET_FMT_lx " SP=%04x:" TARGET_FMT_lx,
count, intno, error_code, is_int,
env->hflags & HF_CPL_MASK,
env->segs[R_CS].selector, env->eip,
(int)env->segs[R_CS].base + env->eip,
env->segs[R_SS].selector, env->regs[R_ESP]);

其中 is_int=1 的情况为中断源来自指令,而 is_int=0 的情况为中断源来自硬件。

虽然我们可以在这里进行拦截,但在这里进行拦截会导致 CPU 被挂起,我们不妨看一下我们这个配置下 QEMU 的线程模型:

  • thread 0: iothread,协程,负责处理 I/O 事件,时钟中断等
  • thread 1: rcu,线程,负责协调线程间的同步
  • thread 2: vcpu,线程,负责模拟 CPU 处理指令
  • thread 3: edu 线程,模拟 edu 设备的线程 (这里其实是一个刻意设立的线程,不然他大可直接在 thread 0 中处理)

为了尽可能降低干扰,我决定单独起一个线程进行拦截,这样就不会影响到 CPU 的执行了。

我们对于中断的拦截应当设立在中断传播过程或者中断源上,但对每一个中断源进行处理较为麻烦,因此比较理想的方案是在中断传播过程中进行拦截,即在 PIC 上进行拦截。上文提到了 i440fx 提供了 i8259ioapic,我们可以考虑在他们身上下手;但还有 gsi_handler 的存在,我们也可以考虑这里下手。

通过一通调试,我发现这几个东西的关系是这样的:

1
2
3
4
5
6
7
8
9
10
11
12
13
14
15
16
17
18
19
+---------------+
| vCPUs |
+---------------+
^
|
+---------+ +--------------------------------+
| IO-APIC | <- | I8259(2 PCs 1 master 1 slave) |
+---------+ +--------------------------------+
^ ^
|(routes) |(routes)
+-------------------------------+
| gsi_handler |
+-------------------------------+
^
....
|
+-------------------------------+
| hardwares |
+-------------------------------+

为了验证我们的想法是没有问题的,我们不妨直接“实机调试”一下:已知所有的硬件上的目的地都是 tcg_handle_interrupt,我们可以在这里打个断点,然后看看是不是所有的中断都会经过这里,但由于这里的中断数量太过庞大,况且还有个时钟中断不停的发送,因此我们直接编写 gdb 脚本比较现实

1
2
3
4
5
6
7
8
9
10
11
12
13
14
15
16
17
18
19
20
21
22
23
24
25
import gdb
from hashlib import md5
import json

call_stacks = {}

class StackLoggerBreakpoint(gdb.Breakpoint):
def stop(self):
# generate call stack hash
stack = gdb.execute("bt", to_string=True)
if "gsi_handler" not in stack:
return True
return False

def setup_stack_logging():
# b tcg_handle_interrupt
StackLoggerBreakpoint("tcg_handle_interrupt")

gdb.execute("file qemu-8.1.2/build/qemu-system-x86_64") # load file
gdb.execute("set args -D debug.log -d int -no-reboot -nographic -kernel ./bzImage -initrd initramfs.cpio.gz -machine accel=tcg -device edu -append \"earlyprintk=serial,ttyS0 console=ttyS0 loglevel=3 oops=panic panic=1\"") # args
gdb.execute("set pagination off") # disable pagination
gdb.execute("set confirm off") # disable confirm
gdb.execute("set print frame-arguments none") # avoid printing frame arguments
setup_stack_logging()
gdb.execute("run") # go

这个脚本记录了所有调用到 tcg_handle_interrupt 的调用栈,并且通过禁止显示参数,使用 md5 来对调用栈进行去重,最后将结果保存到 call_stacks 中,这里只给出了一个简单的示例代码,并非当时的代码(因为后面各种调试加了太多东西了)。

通过这一通记录,我们发现还真有不少中断是不经过 gsi_handler 的,但这些不经过 gsi_handler 的中断大多都是来自 CPU 线程,看对应的调用栈应该是 CPU 访存相关的,不是外设中断。但也有部分中断是来自外设的,看调用栈是在设备初始化期间发生的,但跑起来就没有了,我猜测是虚拟机实现的问题。大体上拦截 gsi_handler 是没有问题的。

让我们来看一下 gsi_handler 的代码:

题外话: 当时大作业用的是 5.2.0,这个 gsi_handler 还没这么复杂,当时就是几行解决,没有 XEN 没有 两张 ioapic,只有一个 i8259 跟一个 ioapic,不过不影响

1
2
3
4
5
6
7
8
9
10
11
12
13
14
15
16
17
18
19
20
21
22
23
24
25
26
27
28
29
30
31
32
void gsi_handler(void *opaque, int n, int level)
{
GSIState *s = opaque;

trace_x86_gsi_interrupt(n, level);
switch (n) {
case 0 ... ISA_NUM_IRQS - 1:
if (s->i8259_irq[n]) {
/* Under KVM, Kernel will forward to both PIC and IOAPIC */
qemu_set_irq(s->i8259_irq[n], level);
}
/* fall through */
case ISA_NUM_IRQS ... IOAPIC_NUM_PINS - 1:
#ifdef CONFIG_XEN_EMU
/*
* Xen delivers the GSI to the Legacy PIC (not that Legacy PIC
* routing actually works properly under Xen). And then to
* *either* the PIRQ handling or the I/OAPIC depending on
* whether the former wants it.
*/
if (xen_mode == XEN_EMULATE && xen_evtchn_set_gsi(n, level)) {
break;
}
#endif
qemu_set_irq(s->ioapic_irq[n], level);
break;
case IO_APIC_SECONDARY_IRQBASE
... IO_APIC_SECONDARY_IRQBASE + IOAPIC_NUM_PINS - 1:
qemu_set_irq(s->ioapic2_irq[n - IO_APIC_SECONDARY_IRQBASE], level);
break;
}
}

拦截方案的设计

题外话: 如果你刚好跟我是校友,也选了这门课,也有幸找到了这篇 blog,麻烦帮我问问这么做有没有毛病

这样的话我们直接对着 gsi_handler 动刀就可以啦,但因为作业上还有别的要求,我就顺便做了在中断源上拦截的功能。我们设计一个模块为 intsvc,那么他跟 qemu 硬件的关系如下:

1
2
3
4
5
6
7
8
9
10
11
12
13
14
15
16
17
18
19
+---------------+
| vCPUs |
+---------------+
^
|
+---------+ +--------------------------------+
| IO-APIC | <- | I8259(2 PCs 1 master 1 slave) |
+---------+ +--------------------------------+
^ ^
|(routes) |(routes)
+-------------------------------+ INTERCEPTION +---------+
| gsi_handler | <-----------------> | |
+-------------------------------+ | |
^ | |
.... | INT SVC |
| | |
+-------------------------------+ INTERCEPTION | |
| hardwares | <-----------------> | |
+-------------------------------+ +---------+

由于 qemu 中的每一个“硬件”都是信息体,本质上就是信息之间的处理,并且硬件如果名没有发生大的变动的话,他的地址也是不会改变的,因此我们可以通过单独启动一个线程来存储他的地址,在拦截放行的时候直接使用这个地址来继续他没有完成的任务。

为了保证一定的用户体验,我们不妨实现一个 http 服务,再编写一个客户端与其通讯来实现控制。

动刀

观察一下 qemu 的项目结构,使用了 meson,调用虚拟机创建程序时命令行参数处理在 qemu_init,同目录下 meson.build 定义了编译哪些文件,我们可以在这里加入我们修改的文件,观察 qemu_init 函数对命令行的处理,我们发现他的命令行用宏定义的,真正定义命令行是在 qemu-options.hx,在 ./configure 过程中形成 qemu-options.h

加入命令行参数定义

编辑 qemu-options.hx,插入以下内容:

1
2
3
DEF("intsvc", HAS_ARG, QEMU_OPTION_int_svc, \
"-intsvc addr:port start INT signal interruption service\n",
QEMU_ARCH_ALL)

我们不妨先编译执行一下试试,这次我们需要做一次完整的编译 ./run.sh -c.

很好,他出现在了 --help 中,其实在这个过程中我们也通过这个宏定义了一个 Option 常量,用于代码中的命令行参数后续的处理。

我们先不急着改 qemu_init,我们先给我们的项目开一个头文件,开一个 c 文件方便后续的使用,这里直接跟 vl.c 放到同一个目录下。

我们先看头文件,头文件丢在 include/intsvc/intsvc.h 中,内容先简单写写:

1
2
3
4
5
6
7
#include <stdio.h>
#include "qemu/osdep.h"

/**
* @brief Parse options from qemu command line and initialize the service
*/
void int_svc_parse_options(const char *options);

然后我们编写一下 intsvc.csoftmmu/intsvc.c:

1
2
3
4
5
6
7
8
#include "intsvc/intsvc.h"
#include <stdlib.h>

void int_svc_parse_options(const char *options)
{
printf("%s\n", options);
exit(0);
}

顺便编辑一下 softmmu/meson.build,将 intsvc.c 加入到构筑系统中。

现在我们可以编辑 vl.c 了,定位到 qemu_init 函数,我们往下找,很容易就找到处理命令行参数的那一段:

1
2
3
4
5
6
7
8
9
switch(popt->index) {
case QEMU_OPTION_cpu:
/* hw initialization will check this */
cpu_option = optarg;
break;
case QEMU_OPTION_hda:
case QEMU_OPTION_hdb:
case QEMU_OPTION_hdc:

我们在一个合适的地方插入我们的代码,我看开头就很合适:

1
2
3
4
5
switch(popt->index) {
case QEMU_OPTION_int_svc:
int_svc_parse_options(optarg);
break;
case QEMU_OPTION_cpu:

不要忘记在 vl.c 的开头包含头文件:

1
2
3
4
5
#include "sysemu/seccomp.h"
#include "sysemu/tcg.h"
#include "sysemu/xen.h"
// intsvc header
#include "intsvc/intsvc.h"

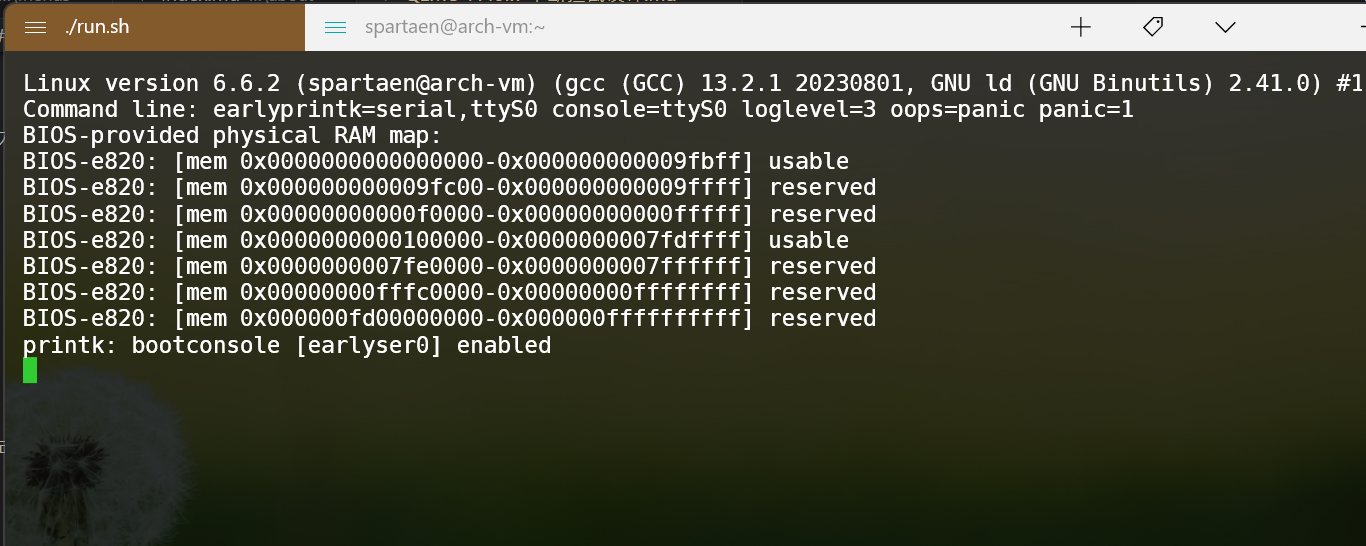
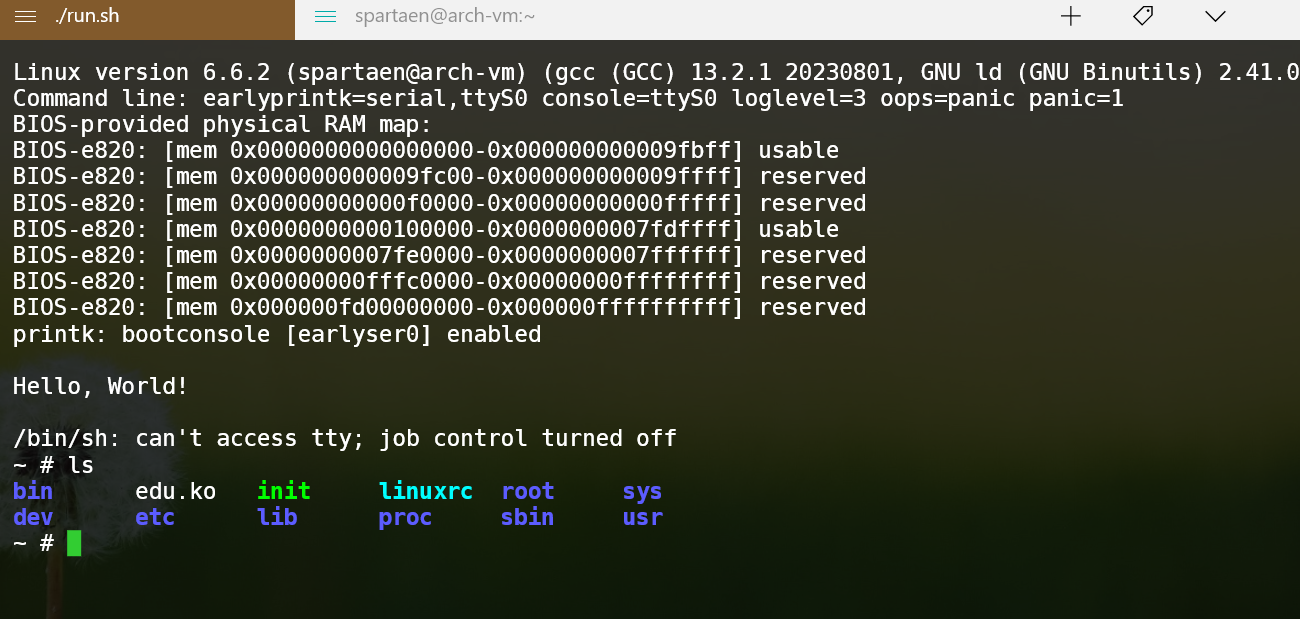
修改 run.sh,把开头的 QEMU_ARGS 开头加入 "-intsvc" "0.0.0.0:4444",执行run.sh -b,预期程序应该会输出如下图:

编写基本框架

其实我感觉加入到 iothread 也是一种不错的选择,但考虑到后面有可能涉及到对 iothread 进行加锁操作,可能会有不便,就单独开线程了

我们的中断拦截服务需要单独开一个线程,因此会涉及到线程的创建与释放,还会涉及到一些结构体的操作,因此我们其他模块暴露的 API 有以下:

  • 服务初始化
  • 服务释放
  • 中断记录
  • 中断拦截

因此我们简单写一下 intsvc.h

由于我是看着好几个星期前写的代码复现,可能会有点顺序上的问题,当时确实调试了好久改了很多版,很难从零开始再过一遍当时的思路了,但也剁掉了按照作业要求写的一堆智障代码

1
2
3
4
5
6
7
8
9
10
11
12
13
14
15
16
17
18
19
20
21
22
23
24
25
26
27
28
29
30
31
32
33
34
35
36
37
38
39
40
41
42
43
44
45
46
47
48
49
50
51
52
53
54
55
56
57
58
59
60
61
62
63
#include <stdio.h>
#include "qemu/osdep.h"
#include "qemu/thread.h"

#ifndef INT_SVC_H
#define INT_SVC_H

// 先简单定义几个来源,因为我们直接在 gsi_handler 上动手了,就不拦截 i8259 与 io-apic 了,为什么没有 MSI 呢? 因为 i440fx 还没那么高级,没有 MSI,虽然 io-apic 在后面用到了一点 MSI 相关的实现,但我调试下来发现外设并不会直接使用到 MSI,还是会走 PIC 的
#define SOURCE_GSI 0x00
// #define SOURCE_I8259 0x01
// #define SOURCE_IOAPIC 0x02
#define SOURCE_HW_EDU 0x03

// MAX 0xff, change types in protocol when increasing limit 中断桶大小(最多允许多少个不同的中断号)
#define INT_BUCKET_SIZE 256

// MAX 0xff, change types in protocol when increasing limit 中断来源桶大小(最多允许多少个不同的来源 可以是设备,可以是 PIC 等)
#define SOURCE_BUCKET_SIZE 0x10

// 参数解析完后的结构体
typedef struct int_svc_options
{
char *addr;
int port;
} IntSvcOptions;

/**
* @brief Parse options from qemu command line and initialize the service 服务入口函数,解析命令行参数并初始化服务
*/
void int_svc_parse_options(const char *options);

/**
* @brief Management server epoll thread epoll 线程函数
*/
void *int_svc_service_run(void *arg);

/**
* @brief Log interrupts in other threads (basically in iothread gsi_handler, i8259, ioapic) 记录中断(计数,按照来源)
*/
void int_svc_log_int_with_source(int source, int intno, int level);

/**
* @brief Log interrupts in CPU thread 记录中断(计数,直接CPU计数)
*/
void int_svc_log_int_cpu(int intvec);

/**
* @brief Check whether the timer interrupt should be intercepted 判断时钟中断是否截断
*
* @return int 1 if intercepted, 0 if not
*/
int int_svc_timer_int_intercept(void);

/**
* @brief Check whether the interrupt should be intercepted 判断中断是否应当拦截
*
* @return int 1 if intercepted, 0 if not
*/
int int_svc_intercept_other_int(int source, void *opaque, int irq, int level);

void int_svc_service_clean_up(void);

#endif

相应的,我们在 intsvc.c 中实现这些函数:

1
2
3
4
5
6
7
8
9
10
11
12
13
14
15
16
17
18
19
20
21
22
23
24
25
26
27
28
29
30
31
32
33
34
35
36
37
38
39
40
41
42
43
44
45
46
47
48
49
50
51
52
53
54
55
56
57
58
59
60
61
62
63
64
65
66
67
68
69
70
71
72
73
74
75
76
77
78
79
80
81
82
83
84
85
86
87
88
89
90
91
92
93
94
95
96
97
98
99
100
101
102
103
104
105
106
107
108
109
110
111
112
113
114
115
116
117
118
119
120
121
122
123
124
125
126
127
128
129
130
131
132
133
134
135
136
137
138
139
140
141
142
143
#include "intsvc/intsvc.h"

// Service switch, initialized by qemu_init 服务开关,是否启用中断拦截
static uint8_t int_svc_enabled = 0;

// Timer interrupt interception switch, controlled by the service 时钟中断拦截开关,是否拦截时钟中断
static uint8_t int_svc_sw_intercept_timer_int = 0;

// Interrupt switch bucket by source 其他中断拦截开关,是一个 SOURCE_BUCKET_SIZE * INT_BUCKET_SIZE 的桶
static uint8_t int_svc_sw_bucket[SOURCE_BUCKET_SIZE][INT_BUCKET_SIZE];

// May impacts performance 中断拦截计数器开关,可能影响性能
static uint8_t int_svc_stat_irqs = 0;

// 服务监听设置
static struct int_svc_options int_svc_options;

// 服务线程
static QemuThread int_svc_thread;

// stats 中断拦截计数
static int int_svc_logged_ints = 0;
static int int_svc_logged_ints_cpu = 0;
// stats lock 中断拦截计数锁,防止出现 data race
static QemuMutex int_svc_ints_stats_lock; // for other threads
static QemuMutex int_svc_ints_stats_cpu_lock; // for CPU thread, will be critical when we have multiple vCPUs

void int_svc_parse_options(const char *options)
{
// 既然要解析了 那服务是要启动的,设置开关
int_svc_enabled = 1;
int_svc_stat_irqs = 1;
// 首先处理传入的参数,应当为 address:port,直接 split 开,注意这里没做检查,不是好的实践,这里使用了 glib 的实现,因为 qemu 整个项目是用的 glib 当然下面还是出现了混用 glibc 的情况,不是好实践
// 内存分配千万别混!!!这里再怎么瞎搞也没混用内存相关的
char *opt = g_strdup(options);
char **addr = g_strsplit(opt, ":", 2);
// 复制到结构体
int_svc_options.addr = addr[0];
int_svc_options.port = atoi(addr[1]);
// initialize all other variables 初始化开关桶 默认全拦截
memset(int_svc_sw_bucket, 1, sizeof(uint8_t) * SOURCE_BUCKET_SIZE * INT_BUCKET_SIZE);
// 初始化锁
qemu_mutex_init(&int_svc_ints_stats_lock);
qemu_mutex_init(&int_svc_ints_stats_cpu_lock);
}

void int_svc_log_int_with_source(int source, int intno, int level)
{
// 低电平不算数 跳过 这里的 likely 与 unlikely 可以直接不看,这是用于触发分支预测的 (虽然我也不知道用的对不对)
if (level == 0)
{
return;
}
// 如果服务没开,退出
if (likely(!int_svc_enabled))
{
return;
}
// 开关没开 退出
if (unlikely(!int_svc_stat_irqs))
{
return;
}
// 先锁 再加
qemu_mutex_lock(&int_svc_ints_stats_lock);
int_svc_logged_ints++;
qemu_mutex_unlock(&int_svc_ints_stats_lock);
}

void int_svc_log_int_cpu(int intvec)
{
// 同上,不赘述
if (likely(!int_svc_enabled))
{
return;
}
if (unlikely(!int_svc_stat_irqs))
{
return;
}
qemu_mutex_lock(&int_svc_ints_stats_cpu_lock);
int_svc_logged_ints_cpu++;
qemu_mutex_unlock(&int_svc_ints_stats_cpu_lock);
}

int int_svc_timer_int_intercept(void)
{
// 同上 先查服务是否启动
if (unlikely(!int_svc_enabled))
{
return 0;
}
// 检查是否应当拦截,不拦截就 return 0
if (unlikely(!int_svc_sw_intercept_timer_int))
{
return 0;
}
return 1;
}

int int_svc_intercept_other_int(int source, void *opaque, int irq, int level)
{
// Optimize for the case that the interception is disabled 同上
if (unlikely(!int_svc_enabled))
{
return 0;
}
// IRQ Clear, pass 如果是低电平 直接返回
if (level == 0)
{
return 0;
}

// Now, let's get back on track
// Check whether the interception is enabled 检查是否应当拦截
if (source < SOURCE_HW_EDU) // 如果是 PIC 查中断号
{
if (int_svc_sw_bucket[source][irq] == 0)
{
return 0;
}
}
else
{
// 非 PIC 直接查 0 元素
if (int_svc_sw_bucket[source][0] == 0)
{
return 0;
}
}
// 拦截
return 1;
}

// 释放
void int_svc_service_clean_up(void)
{
if (int_svc_enabled)
{
int_svc_enabled = 0;
// 这里不完善
}
}

到这里,我们的中断拦截就差不多了,但是这样的话中断会传丢,我们后面总要保证中断能够手动放行,因此我们定义结构体:

1
2
3
4
5
6
7
8
9
10
11
12
13
14
15
typedef struct int_svc_interrupt_requests // 中断请求
{
void *opaque; // 调用时的 opaque,总之是个指针,对于 GSI就是 GSIState,对于 edu 设备就是 edu 设备的 pdev
int is_set; // 1 if the int is set, reset if we replay the signal // 1 的话就是这个中断是拦截到的,我们放行后就置 0
int count; // Count of intercepted requests, reset if we replay the signal // 在收到放行信号之前一共收到了多少次
} IntSvcInterruptRequests;

typedef struct int_svc_interceptions
{
IntSvcInterruptRequests *requests; // Array of requests // 中断请求的数组指针,为了节省空间,非路由设备不分配
int is_router; // 1 if the int was captured on IC like i8259, ioapic, 0 if captured on hardwarez // 是否为 PIC 或具备路由功能,比如 i8259、ioapic
void *opaque; // 对于像是 edu 设备这种中断源,用这个,以下字段同上面的中断请求
int is_set; // Only used when is_router is 0, reset if we replay the signal
int count; // Count of intercepted requests, reset if we replay the signal
} IntSvcInterceptions;

然后我们小改一下 intsvc.c

1
2
3
4
5
6
7
8
9
10
11
12
13
14
15
16
17
18
19
20
21
22
23
24
25
26
27
28
29
30
31
32
33
34
35
36
37
38
39
40
41
42
43
44
45
46
47
48
49
50
51
52
53
54
55
56
// bucket 中断记录桶
static IntSvcInterceptions int_svc_int_bucket[INT_BUCKET_SIZE];
// queue lock 桶的锁
static QemuMutex int_svc_int_bucket_lock;
// ......
int int_svc_intercept_other_int(int source, void *opaque, int irq, int level)
{
// 同上
// Optimize for the case that the interception is disabled
if (unlikely(!int_svc_enabled))
{
return 0;
}
// IRQ Clear, pass
if (level == 0)
{
return 0;
}

// Now, let's get back on track // 先上锁
qemu_mutex_lock(&int_svc_int_bucket_lock);
// Check whether the interception is enabled
if (source < SOURCE_HW_EDU)
{
if (int_svc_sw_bucket[source][irq] == 0)
{
qemu_mutex_unlock(&int_svc_int_bucket_lock);
return 0;
}
}
else
{
if (int_svc_sw_bucket[source][0] == 0)
{
qemu_mutex_unlock(&int_svc_int_bucket_lock);
return 0;
}
}
// Stat and intercept // 记录对应的中断
if (source < SOURCE_HW_EDU)
{
int_svc_int_bucket[source].requests[irq].is_set = 1;
int_svc_int_bucket[source].requests[irq].count++;
int_svc_int_bucket[source].requests[irq].opaque = opaque;
}
else
{
int_svc_int_bucket[source].is_set = 1;
int_svc_int_bucket[source].count++;
int_svc_int_bucket[source].opaque = opaque;
}
// 解锁
qemu_mutex_unlock(&int_svc_int_bucket_lock);
return 1;
}

处理对应的组件

这个框架大体 OK 了,我们现在开始给对应的组件动刀,这里主要是针对三个类型的设备动刀:两个中断源(时钟中断 i8254edu 设备),中断 PIC (其实不是 PIC gsi_handler)。

时钟中断 i8254

先对 i8254 动刀,i8254hw/timer/i8254.c,由于其为时钟中断,比较特殊,这里直接做拦截,不做其放行函数即可(因为他无时无刻在产生中断)。

观察他的源码,最终敲定在 pit_irq_timer_update 上动刀。

动刀后的代码如下:

1
2
3
4
5
expire_time = pit_get_next_transition_time(s, current_time);
irq_level = pit_get_out(s, current_time);
if (!int_svc_timer_int_intercept()) {
qemu_set_irq(s->irq, irq_level);
}

该设备不需要放行中断。

edu 设备

老样子,直接看代码,很明显是 edu_raise_irq

对于 PCI 设备,他发起中断的方式是调用 msi_notify 或者 pci_set_irq,只有一个可变的参数为 PCIDevice,即 edu 设备的 EDUState 所“继承”(参考 QOM)的 PCIDevice,因此我们只需要保存一下 edu 的首地址就没有问题了,改后代码如下:

1
2
3
4
5
6
7
8
9
10
11
12
13
14
15
static void edu_raise_irq(EduState *edu, uint32_t val)
{
edu->irq_status |= val;
if (edu->irq_status) {
// Intercept here since we have no space for storing more than 1 argument
if (int_svc_intercept_other_int(SOURCE_HW_EDU, (void *)&edu->pdev, 0, 1)) {
return;
}
if (edu_msi_enabled(edu)) {
msi_notify(&edu->pdev, 0);
} else {
pci_set_irq(&edu->pdev, 1);
}
}
}

中断放行方案也比较简单,直接在其他线程调用 msi_notify 或者 pci_set_irq 即可,其中 edu_msi_enabled 本质上是调用 msi_enabled 也是只用 edu->pdev

gsi_handler

首先观察代码,传进来的 opaque 其实是 GSIState 的指针,下面就按照中断号选择合适的设备并调用对应设备的“输入函数”,因此我们直接存住 opaque 的数值、中断号就可以。

直接在原始的 gsi_handler 上动刀,修改后源码如下:

1
2
3
4
5
6
7
void gsi_handler(void *opaque, int n, int level)
{
int_svc_log_int_with_source(SOURCE_GSI, n, level);
if (int_svc_intercept_other_int(SOURCE_GSI, opaque, n, level)) {
return;
}
// ...

简单粗暴。

放行方案同样可以简单粗暴,我们直接“复制”一份“干净”的gsi_handler,丢到 gsi_handler 下面,同时在 x86.h 中加入对应的函数原型。

服务器通讯

协议

协议使用 Type–length–value(TLV) 模式,直接定义结构体与简单的规格:

1
2
3
4
5
6
7
8
9
10
11
12
13
14
15
16
17
18
19
/**
* @brief Protocol struct in TLV
* Ops
* 0x00 ping ping 命令,返回字符串 pong
* 0x01 version 查询版本 版本长度 1 字节
* 0x02 get interception status 查询拦截开关,长度1+开关桶大小(16*256)字节
* 0x03 get interception stats 获取拦截计数,长度4+4字节,分别对应外设中断与CPU处理的硬件中断
* 以上操作请求长度为 0
* 0x04 toggle timer interrupt interception 设置时钟中断拦截状态,请求长度 1 字节,返回长度 1 字节,返回开关状态
* 0x05 toggle interruption by source 设置其他拦截开关,请求长度 3 字节,分别对应位置、中断号、开关状态,返回同请求
* 0x06 get interception list 获取拦截到的请求,无请求长度,返回长度 N*12 字节 N 为当前拦截了多少类中断
* 0x07 pass interception by source and intno 放行中断,请求长度 2 字节,分别代表位置、中断号,返回不定长,为可读字符串
*/
typedef struct int_svc_protocol_tlv
{
uint8_t type;
uint32_t length;
uint8_t *value;
} IntSvcProtocolTlv;

服务端

下面编码服务端:

先在 intsvc.h 中定义一下用户的东西:

1
2
3
4
5
6
7
8
9
10
typedef struct int_svc_client_context
{
// May add more fields
int fd; // fd
int is_tlv_set; // 是否完成了一个 tlv
int buf_size; // 当前缓存长度
int buf_limit; // 缓存长度限制,即分配了多大内存
uint8_t *buf; // 当前接受缓存
IntSvcProtocolTlv tlv;
} IntSvcClientContext;

直接在 intsvc.c 中实现,贴代码:

1
2
3
4
5
6
7
8
9
10
11
12
13
14
15
16
17
18
19
20
21
22
23
24
25
26
27
28
29
30
31
32
33
34
35
36
37
38
39
40
41
42
43
44
45
46
47
48
49
50
51
52
53
54
55
56
57
58
59
60
61
62
63
64
65
66
67
68
69
70
71
72
73
74
75
76
77
78
79
80
81
82
83
84
85
86
87
88
89
90
91
92
93
94
95
96
97
98
99
100
101
102
103
104
105
106
107
108
109
110
111
112
113
114
115
116
117
118
119
120
121
122
123
124
125
126
127
128
129
130
131
132
133
134
135
136
137
138
139
140
141
142
143
144
145
146
147
148
149
150
151
152
153
154
155
156
157
158
159
160
161
162
163
164
165
166
167
168
169
170
171
172
173
174
175
176
177
178
179
180
181
182
183
184
185
186
187
188
189
190
191
192
193
194
195
196
197
198
199
200
201
202
203
204
205
206
207
208
209
210
211
212
213
214
215
216
217
218
219
220
221
222
223
224
225
226
227
228
229
230
231
232
233
234
235
236
237
238
239
240
241
242
243
244
245
246
247
248
249
250
251
252
253
254
255
256
257
258
259
260
261
262
263
264
265
266
267
268
269
270
271
272
273
274
275
276
277
278
279
280
281
282
283
284
285
286
287
288
289
290
291
292
293
294
295
296
297
298
299
300
301
302
303
304
305
306
307
308
309
310
311
312
313
314
315
316
317
318
319
320
321
322
323
324
325
326
327
328
329
330
331
332
333
334
335
336
337
338
339
340
341
342
343
344
345
346
347
348
349
350
351
352
353
354
355
356
357
358
359
360
361
362
363
364
365
366
367
368
369
370
371
372
373
374
375
376
377
378
379
380
381
382
383
384
385
386
387
388
389
390
391
392
393
394
395
396
397
398
399
400
401
402
403
404
405
406
407
408
409
410
411
412
413
414
415
416
417
418
419
420
421
422
423
424
425
426
427
428
429
430
431
432
433
434
435
436
437
438
439
440
441
442
443
444
445
446
447
448
449
450
451
452
453
454
455
456
457
458
459
460
461
462
463
464
465
466
467
468
469
470
471
472
473
474
475
476
477
478
479
480
481
482
483
484
485
486
487
488
489
490
491
492
493
494
495
496
497
498
499
500
501
502
503
504
505
506
507
508
509
510
511
512
513
514
515
516
517
518
519
520
521
522
523
524
525
526
527
528
529
530
531
532
533
534
535
536
537
538
// Socket server fd
static int int_svc_server_fd;

// epoll
static int int_svc_epoll_fd;
static struct epoll_event *int_svc_epoll_events;

int int_svc_server_create(void);
void socket_set_nonblocking(int fd);
void client_toggle_timer_int_interception(int fd, uint8_t value);
char *int_svc_package(uint8_t op, uint32_t len, const char *value);
void client_send_version(int fd);
void client_cmd_ping(int fd);
void client_report_interception_status(int fd);
void client_report_interception_stats(int fd);
void client_toggle_other_int_interception_by_source(int fd, uint8_t source, uint8_t intno, uint8_t value);
void client_get_interception_list(int fd);
void client_pass_interception(int fd, int id, int intno);
void handle_client_cmd(IntSvcClientContext *ctx);
void client_process_tlv(int fd, IntSvcProtocolTlv *tlv);
void client_destroy(int fd, IntSvcClientContext *ctx);

void int_svc_parse_options(const char *options)
{
int_svc_enabled = 1;
int_svc_stat_irqs = 1;
// options store
char *opt = g_strdup(options);
char **addr = g_strsplit(opt, ":", 2);
int_svc_options.addr = addr[0];
int_svc_options.port = atoi(addr[1]);
// initialize all other variables
memset(int_svc_sw_bucket, 1, sizeof(uint8_t) * SOURCE_BUCKET_SIZE * INT_BUCKET_SIZE);
for (int i = 0; i < SOURCE_HW_EDU; i++)
{
int_svc_int_bucket[i].requests = g_new0(IntSvcInterruptRequests, INT_BUCKET_SIZE);
int_svc_int_bucket[i].is_router = 1;
}
qemu_mutex_init(&int_svc_int_bucket_lock);
qemu_mutex_init(&int_svc_ints_stats_lock);
qemu_mutex_init(&int_svc_ints_stats_cpu_lock);
// 创建 epoll 服务器
if (int_svc_server_create() < 0)
{
printf("int_svc: server create failed\n");
exit(1);
}
// 创建线程
qemu_thread_create(&int_svc_thread, "int_svc", int_svc_service_run, NULL, QEMU_THREAD_JOINABLE);
}

// 将 socket 设置为不阻塞
void socket_set_nonblocking(int fd)
{
int flags = fcntl(fd, F_GETFL, 0);
fcntl(fd, F_SETFL, flags | O_NONBLOCK);
}

// 创建 epoll socket 服务器
int int_svc_server_create(void)
{
// 开一个 socket
int_svc_server_fd = socket(AF_INET, SOCK_STREAM, 0);

if (int_svc_server_fd < 0)
{
printf("int_svc: socket create failed\n");
return -1;
}

// set non-blocking 设置非阻塞
socket_set_nonblocking(int_svc_server_fd);

// set address 设置地址
struct sockaddr_in server_addr;
memset(&server_addr, 0, sizeof(server_addr));
server_addr.sin_family = AF_INET;
server_addr.sin_port = htons(int_svc_options.port);
server_addr.sin_addr.s_addr = inet_addr(int_svc_options.addr);

// bind & listen
if (bind(int_svc_server_fd, (struct sockaddr *)&server_addr, sizeof(server_addr)) < 0)
{
printf("int_svc: socket bind failed\n");
return -1;
}

if (listen(int_svc_server_fd, 5) < 0)
{
printf("int_svc: socket listen failed\n");
return -1;
}

// epoll 开一个 epoll_event 结构体
struct epoll_event ev;

// 开结构体数组
int_svc_epoll_events = g_new0(struct epoll_event, EPOLL_MAX_EVENTS);

// ctx instead of fd 分配用户结构体
IntSvcClientContext *ctx = g_new0(IntSvcClientContext, 1);
memset(ctx, 0, sizeof(IntSvcClientContext));
ctx->fd = int_svc_server_fd;

ev.events = EPOLLIN;
ev.data.ptr = ctx;

// 创建 epoll 结构体
int_svc_epoll_fd = epoll_create(1);
if (int_svc_epoll_fd < 0)
{
printf("int_svc: epoll create failed\n");
return -1;
}

// 将服务器丢进 epoll 中
if (epoll_ctl(int_svc_epoll_fd, EPOLL_CTL_ADD, int_svc_server_fd, &ev) < 0)
{
printf("int_svc: epoll ctl failed\n");
return -1;
}

return 0;
}

// 打包 TLV 工具函数
char *int_svc_package(uint8_t op, uint32_t len, const char *value)
{
char *buf = g_new0(char, 5 + len);
buf[0] = op;
memcpy(buf + 1, &len, 4);
memcpy(buf + 5, value, len);
return buf;
}

// 指令 0x01 实现 发送版本
void client_send_version(int fd)
{
char *data = g_new0(char, 1);
data[0] = INT_SVC_VERSION;
char *buf = int_svc_package(0x00, 1, data);
write(fd, buf, 6);
g_free(buf);
g_free(data);
}

// 指令 0x00 实现 发送 pong
void client_cmd_ping(int fd)
{
char *buf = int_svc_package(0x01, 4, "pong");
write(fd, buf, 5 + 4);
g_free(buf);
}

// 指令 0x02 实现 发送当前设置
void client_report_interception_status(int fd)
{
int len = 0;
char *data = g_new0(char, sizeof(int_svc_sw_intercept_timer_int) + sizeof(int_svc_sw_bucket));
data[0] = int_svc_sw_intercept_timer_int;
len += sizeof(int_svc_sw_intercept_timer_int);
memcpy(data + len, int_svc_sw_bucket, sizeof(int_svc_sw_bucket));
len += sizeof(int_svc_sw_bucket);
char *buf = int_svc_package(0x02, len, data);
write(fd, buf, 5 + len);
g_free(buf);
g_free(data);
}

// 指令 0x03 实现,发送计数
void client_report_interception_stats(int fd)
{
int len = 0;
char *data = g_new0(char, sizeof(int_svc_logged_ints) + sizeof(int_svc_logged_ints_cpu));
memcpy(data, &int_svc_logged_ints, sizeof(int_svc_logged_ints));
len += sizeof(int_svc_logged_ints);
memcpy(data + len, &int_svc_logged_ints_cpu, sizeof(int_svc_logged_ints_cpu));
len += sizeof(int_svc_logged_ints_cpu);
char *buf = int_svc_package(0x03, len, data);
write(fd, buf, 5 + len);
g_free(buf);
g_free(data);
}

// 指令 0x04 实现 设置时钟中断拦截状态
void client_toggle_timer_int_interception(int fd, uint8_t value)
{
int_svc_sw_intercept_timer_int = value;
char *buf = int_svc_package(0x04, 1, (char *)&value);
write(fd, buf, 5 + 1);
}

// 指令 0x05 实现 设置其他中断拦截状态
void client_toggle_other_int_interception_by_source(int fd, uint8_t source, uint8_t intno, uint8_t value)
{
if (source >= SOURCE_HW_EDU)
{
intno = 0;
}
int_svc_sw_bucket[source][intno] = value;
char *data = g_new0(char, 3);
data[0] = source;
data[1] = intno;
data[2] = value;
char *buf = int_svc_package(0x05, 3, data);
write(fd, buf, 5 + 3);
g_free(buf);
g_free(data);
}

// 指令 0x06 实现,获取中断列表
void client_get_interception_list(int fd)
{
int len = 0, irqs = 0;
// 先数一共多少个,首先上锁防止 data race
qemu_mutex_lock(&int_svc_int_bucket_lock);
for (int i = 0; i < SOURCE_BUCKET_SIZE; i++)
{
if (int_svc_int_bucket[i].is_router)
{
for (int j = 0; j < INT_BUCKET_SIZE; j++)
{
if (int_svc_int_bucket[i].requests[j].is_set)
{
irqs++;
}
}
}
else
{
if (int_svc_int_bucket[i].is_set)
{
irqs++;
}
}
}
// now, we know the length of the data 现在算完数量了 开空间
char *data = g_new0(char, irqs * sizeof(IntSvcInterceptionResponse));
// 最后的数据再定义一个结构体 构建结构体
IntSvcInterceptionResponse *responses = (IntSvcInterceptionResponse *)data;
for (int i = 0; i < SOURCE_BUCKET_SIZE; i++)
{
if (int_svc_int_bucket[i].is_router)
{
for (int j = 0; j < INT_BUCKET_SIZE; j++)
{
if (int_svc_int_bucket[i].requests[j].is_set)
{
responses->source = i;
responses->intno = j;
responses->count = int_svc_int_bucket[i].requests[j].count;
responses++;
len += sizeof(IntSvcInterceptionResponse);
}
}
}
else
{
if (int_svc_int_bucket[i].is_set)
{
responses->source = i;
responses->intno = 0;
responses->count = int_svc_int_bucket[i].count;
responses++;
len += sizeof(IntSvcInterceptionResponse);
}
}
}
// 解锁 发送
qemu_mutex_unlock(&int_svc_int_bucket_lock);
char *buf = int_svc_package(0x06, len, data);
write(fd, buf, 5 + len);
g_free(buf);
g_free(data);
}

// 指令 0x07 实现 放行指令
void client_pass_interception(int fd, int id, int intno)
{
// 先检查是否越界
if (id >= SOURCE_BUCKET_SIZE)
{
char *buf = int_svc_package(0x07, 12, "Out of range");
write(fd, buf, 5 + 12);
g_free(buf);
return;
}
if (intno >= INT_BUCKET_SIZE)
{
char *buf = int_svc_package(0x07, 12, "Out of range");
write(fd, buf, 5 + 12);
g_free(buf);
return;
}
// 上锁
qemu_mutex_lock(&int_svc_int_bucket_lock);
// Check whether the interception is still valid 校验是否有拦截,是否有效
if (int_svc_int_bucket[id].is_router)
{
if (!int_svc_int_bucket[id].requests[intno].is_set)
{
qemu_mutex_unlock(&int_svc_int_bucket_lock);
char *buf = int_svc_package(0x07, 20, "No such interception");
write(fd, buf, 5 + 20);
g_free(buf);
return;
}
}
else
{
if (!int_svc_int_bucket[id].is_set)
{
qemu_mutex_unlock(&int_svc_int_bucket_lock);
char *buf = int_svc_package(0x07, 20, "No such interception");
write(fd, buf, 5 + 20);
g_free(buf);
return;
}
}
// Pass interception 放行中断
switch (id)
{
// 对于 EDU 设备
case SOURCE_HW_EDU:
// 先锁 iothread 防止 data race
qemu_mutex_lock_iothread();
// since it will eventually call gsi_handler, and will lock int_svc_int_bucket_lock, we need to backup data first and unlock
// 因为它最终还是会调用 gsi_handler,这样就会导致死锁,我们现在锁了 iothread,那么没有线程能够访问到 gsi_handler,因此我们可以暂且解锁 int_svc_int_bucket_lock 完成接下来的操作
void *opaque = int_svc_int_bucket[id].opaque;
qemu_mutex_unlock(&int_svc_int_bucket_lock);
if (msi_enabled(opaque))
{
msi_notify(opaque, 0);
}
else
{
pci_set_irq(opaque, 1);
}
// relock 重新锁上
qemu_mutex_lock(&int_svc_int_bucket_lock);
// 解锁 iothread
qemu_mutex_unlock_iothread();
break;
case SOURCE_GSI:
// 对于 gsi 直接调用干净的版本
gsi_handler_clean(int_svc_int_bucket[id].requests[intno].opaque, intno, 1);
break;
default:
// 其他情况解锁 报错
qemu_mutex_unlock(&int_svc_int_bucket_lock);
char *buf = int_svc_package(0x07, 15, "Not implemented");
write(fd, buf, 5 + 15);
g_free(buf);
return;
}
// Clear the interception 放行完了,那么这个中断拦截就暂时失效了,我们直接把他清零
if (int_svc_int_bucket[id].is_router)
{
int_svc_int_bucket[id].requests[intno].is_set = 0;
int_svc_int_bucket[id].requests[intno].count = 0;
}
else
{
int_svc_int_bucket[id].is_set = 0;
int_svc_int_bucket[id].count = 0;
}
// 解锁,收工
qemu_mutex_unlock(&int_svc_int_bucket_lock);
char *buf = int_svc_package(0x07, 2, "OK");
write(fd, buf, 5 + 2);
g_free(buf);
}

// 客户端释放函数
void client_destroy(int fd, IntSvcClientContext *ctx)
{
shutdown(fd, SHUT_RDWR);
close(fd);
g_free(ctx->buf);
g_free(ctx);
}

// 服务端处理 TLV 的路由
void client_process_tlv(int fd, IntSvcProtocolTlv *tlv)
{
switch (tlv->type)
{
case 0x00:
client_send_version(fd);
break;
case 0x01:
client_cmd_ping(fd);
break;
case 0x02:
client_report_interception_status(fd);
break;
case 0x03:
client_report_interception_stats(fd);
break;
case 0x04:
client_toggle_timer_int_interception(fd, tlv->value[0]);
break;
case 0x05:
client_toggle_other_int_interception_by_source(fd, tlv->value[0], tlv->value[1], tlv->value[2]);
break;
case 0x06:
client_get_interception_list(fd);
break;
case 0x07:
client_pass_interception(fd, tlv->value[0], tlv->value[1]);
break;
}
}

// 处理客户端发来的数据
void handle_client_cmd(IntSvcClientContext *ctx)
{
int fd = ctx->fd;
uint8_t *buf = g_new0(uint8_t, 1024);
// 先读 1024 字节
int n = read(fd, buf, 1024);
// 有问题就释放,几个例外的处理
if (n < 0)
{
client_destroy(fd, ctx);
goto int_svc_client_recv_exit;
}
// client closed
if (n == 0)
{
client_destroy(fd, ctx);
goto int_svc_client_recv_exit;
}
// check if the buffer is full 检查buffer是否满了,满了就来个 resize 拉高一些,注意这里没设置最高限制!生产环境请设置
while (n + ctx->buf_size > ctx->buf_limit)
{
// resize the buffer
ctx->buf_limit *= 2;
ctx->buf = g_realloc(ctx->buf, ctx->buf_limit);
}
// copy the data 先把接收的 buffer 复制进去
memcpy(ctx->buf + ctx->buf_size, buf, n);
ctx->buf_size += n;
// process tlv 处理 TLV
for (;;)
{
// 如果凑不出一个 TLV,还没有更多数据,就先退出等接下来的数据
if (ctx->buf_size < 5)
{
goto int_svc_client_recv_exit;
}
// check if the tlv is complete 检查 TLV 是否设置,完整则设施上对应的 flag,并预分配空间
if (ctx->is_tlv_set == 0)
{
ctx->tlv.type = ctx->buf[0];
ctx->tlv.length = ctx->buf[1];
ctx->tlv.value = g_new0(uint8_t, ctx->tlv.length);
ctx->is_tlv_set = 1;
}
// 如果没有更多是数据了,凑不齐 TLV,退出
if (ctx->buf_size < ctx->tlv.length + 5)
{
goto int_svc_client_recv_exit;
}
// copy the value 把 value 部分 copy进去
memcpy(ctx->tlv.value, ctx->buf + 5, ctx->tlv.length);
// process the tlv 处理 TLV
client_process_tlv(fd, &ctx->tlv);
// reset the tlv 处理完后重置
ctx->is_tlv_set = 0;
ctx->buf_size -= ctx->tlv.length + 5;
// 将剩下的部分前移
memcpy(ctx->buf, ctx->buf + ctx->tlv.length + 5, ctx->buf_size);
}
int_svc_client_recv_exit:
g_free(buf);
}

// 主线程
void *int_svc_service_run(void *arg)
{
int nfds, connfd;
struct epoll_event ev;
for (;;)
{
if (int_svc_enabled == 0)
{
return NULL;
}
// 等待
nfds = epoll_wait(int_svc_epoll_fd, int_svc_epoll_events, EPOLL_MAX_EVENTS, -1);
if (nfds < 0)
{
printf("int_svc: epoll wait failed\n");
exit(1);
}

// 遍历
for (int i = 0; i < nfds; i++)
{
IntSvcClientContext *iter_ctx = int_svc_epoll_events[i].data.ptr;
// 如果是新连接
if (iter_ctx->fd == int_svc_server_fd)
{
// 先 accept
connfd = accept(int_svc_server_fd, (struct sockaddr *)NULL, NULL);
if (connfd < 0)
{
printf("int_svc: accept failed\n");
exit(1);
}
// 设置非阻塞
socket_set_nonblocking(connfd);
// send endian test data 发一段数据辅助客户端判断服务端端序
uint32_t endian_test = 1;
write(connfd, &endian_test, sizeof(uint32_t));
// 设置 epoll 设置结构体
ev.events = EPOLLIN | EPOLLET;
IntSvcClientContext *ctx = g_new0(IntSvcClientContext, 1);
memset(ctx, 0, sizeof(IntSvcClientContext));
ctx->buf = g_new0(uint8_t, 1024);
ctx->buf_limit = 1024;
ctx->fd = connfd;
ev.data.ptr = ctx;
if (epoll_ctl(int_svc_epoll_fd, EPOLL_CTL_ADD, connfd, &ev) < 0)
{
printf("int_svc: epoll ctl failed\n");
exit(1);
}
}
else
{
// 否则就处理客户端发来的数据
handle_client_cmd(iter_ctx);
}
}
}
}

客户端

服务端就差不多了,接下来我们就可以编写客户端了:客户端用 python 写了一个类似于 shell 的东西:

1
2
3
4
5
6
7
8
9
10
11
12
13
14
15
16
17
18
19
20
21
22
23
24
25
26
27
28
29
30
31
32
33
34
35
36
37
38
39
40
41
42
43
44
45
46
47
48
49
50
51
52
53
54
55
56
57
58
59
60
61
62
63
64
65
66
67
68
69
70
71
72
73
74
75
76
77
78
79
80
81
82
83
84
85
86
87
88
89
90
91
92
93
94
95
96
97
98
99
100
101
102
103
104
105
106
107
108
109
110
111
112
113
114
115
116
117
118
119
120
121
122
123
124
125
126
127
128
129
130
131
132
133
134
135
136
137
138
139
140
141
142
143
144
145
146
147
148
149
150
151
152
153
154
155
156
157
158
159
160
161
162
163
164
165
166
167
168
169
170
171
172
173
174
175
176
177
178
179
180
181
182
183
184
185
186
187
188
189
190
191
192
193
194
195
196
197
198
199
200
201
202
203
204
205
206
207
208
209
210
211
212
213
import socket
import struct
import re

# 常量必须与服务端一致
SOURCE_TABLE = {
0: 'GSI',
1: 'I8259',
2: 'IOAPIC',
3: "HW_EDU"
}

SOURCE_BUCKET_SIZE = 0x10
INT_BUCKET_SIZE = 256

# 服务端信息
IP = '192.168.135.100' # Server IP address
PORT = 4444 # Server port

# 建立 socket 通讯
sock = socket.socket(socket.AF_INET, socket.SOCK_STREAM)
sock.connect((IP, PORT))

# 先判断个端序
endian_test_data = sock.recv(4)

if endian_test_data == b'\x00\x00\x00\x01':
ENDIAN = 'big'
elif endian_test_data == b'\x01\x00\x00\x00':
ENDIAN = 'little'

# 初始化一下 TLV 需要的东西
buf = b''
current_pdu = {
"op": None,
"length": None,
"data": None
}

# TLV 助手函数,发送函数
def send_request(op, data=b''):
len_data = len(data)
if ENDIAN == 'big':
packet = struct.pack('>BI', op, len_data) + data
else:
packet = struct.pack('<BI', op, len_data) + data
sock.sendall(packet)
buf = sock.recv(1024)
if ENDIAN == 'big':
current_pdu = {
"op": buf[0],
"length": struct.unpack('>I', buf[1:5])[0],
"data": buf[5:]
}
else:
current_pdu = {
"op": buf[0],
"length": struct.unpack('<I', buf[1:5])[0],
"data": buf[5:]
}
while current_pdu["length"] > len(current_pdu["data"]):
buf = sock.recv(current_pdu["length"] - len(current_pdu["data"]))
current_pdu["data"] += buf
pdu = current_pdu
return pdu

# 命令行
def command_prompt():
inp = input("(intsvc)> ")
return inp

def help():
print("ver - Get version")
print("ping - Ping")
print("status - Get status")
print("stats - Get statistics")
print("set-int-timer <value> - Set interrupt timer")
print("set-int <source> <intno> <value> - Set interrupt")
print("ls - List interrupts")
print("send <source> <intno> - Send interrupt")
print("exit - Exit")

# 简单的输出函数
def pretty_print_switches(data):
sw_intercept_timer_int = data[0]
int_svc_sw_bucket = data[1:]
print("Intercept timer INT: " + (sw_intercept_timer_int >= 1 and "on" or "off"))
# We only implemented GSI and HW_EDU
# Find ranges that equals 0
intercepted_range = []
range_start = 0
range_end = 0
for i in range(0, INT_BUCKET_SIZE):
if int_svc_sw_bucket[i] == 0:
range_end = i
else:
if range_end - range_start > 0:
intercepted_range.append((range_start, range_end))
range_start = i + 1
print("GSI(passthrough):")
if len(intercepted_range) == 0:
print(" None")
else:
for i in intercepted_range:
print(f" {i[0]}-{i[1]}")
print("HW_EDU(passthrough):")
if (int_svc_sw_bucket[INT_BUCKET_SIZE * 3] == 1):
print(" None")
else:
print(" All")

# 简单的输出函数
def pretty_print_interrupts(data):
print("Interrupts:")
# typedef struct int_svc_interception_response {
# int source;
# int intno;
# int count;
# } IntSvcInterceptionResponse;
# 12 bytes per entry
if data == b'':
print(" None")
return
for i in range(0, len(data), 12):
if ENDIAN == 'big':
source = struct.unpack('>I', data[i:i+4])[0]
intno = struct.unpack('>I', data[i+4:i+8])[0]
count = struct.unpack('>I', data[i+8:i+12])[0]
else:
source = struct.unpack('<I', data[i:i+4])[0]
intno = struct.unpack('<I', data[i+4:i+8])[0]
count = struct.unpack('<I', data[i+8:i+12])[0]
print(f" {SOURCE_TABLE[source]}({source}):{intno} - {count}")


# 响应打印函数
def print_response(response):
op = response["op"]
length = response["length"]
data = response["data"]
if op == 0x00:
print(f"Version: {int.from_bytes(data, byteorder='big')}")
elif op == 0x01:
print(data.decode('utf-8'))
elif op == 0x02:
pretty_print_switches(data)
elif op == 0x03:
if ENDIAN == 'big':
print(f"Interrupts on Chip: {struct.unpack('>I', data[0:4])[0]}")
print(f"Interrupts Inside CPU: {struct.unpack('>I', data[4:8])[0]}")
else:
print(f"Interrupts on Chip: {struct.unpack('<I', data[0:4])[0]}")
print(f"Interrupts Inside CPU: {struct.unpack('<I', data[4:8])[0]}")
elif op == 0x04:
print(f"Interrupt timer interception switched " + ("on" if data[0] >= 1 else "off") + ".")
elif op == 0x05:
print(f"Interrupt {SOURCE_TABLE[data[0]]}:{data[1]} switched " + ("on" if data[2] >= 1 else "off") + ".")
elif op == 0x06:
pretty_print_interrupts(data)
elif op == 0x07:
print(data.decode('utf-8'))

# 主函数
def main():
while True:
try:
response = b""
inp = command_prompt()
inp = re.sub(' +', ' ', inp)
inp = inp.split(" ")
cmd = inp[0]
if cmd == 'ver':
response = send_request(0x00)
elif cmd == 'ping':
response = send_request(0x01)
elif cmd == 'status':
response = send_request(0x02)
elif cmd == 'stats':
response = send_request(0x03)
elif cmd == 'set-int-timer':
data = bytes([int(inp[1])])
response = send_request(0x04, data)
elif cmd == 'set-int':
source = int(inp[1])
intno = int(inp[2])
value = int(inp[3])
data = bytes([source, intno, value])
response = send_request(0x05, data)
elif cmd == 'ls':
response = send_request(0x06)
elif cmd == 'send':
id_val = int(inp[1])
intno = int(inp[2])
data = bytes([id_val, intno])
response = send_request(0x07, data)
elif cmd == 'exit':
print("Exiting...")
break
elif cmd == 'help':
help()
else:
print("Invalid input, type 'help' for help")
if len(response) > 0:
print_response(response)
except IndexError:
print("Invalid input, type 'help' for help")
except KeyboardInterrupt:
print("Exiting...")
break
except ValueError:
print("Invalid input, type 'help' for help")
if __name__ == '__main__':
main()

测试

到这里,我们就完成编码了,首先执行 run.sh -c 进行一次 clean build 并执行,诶这次虚拟机报错了,没起来:
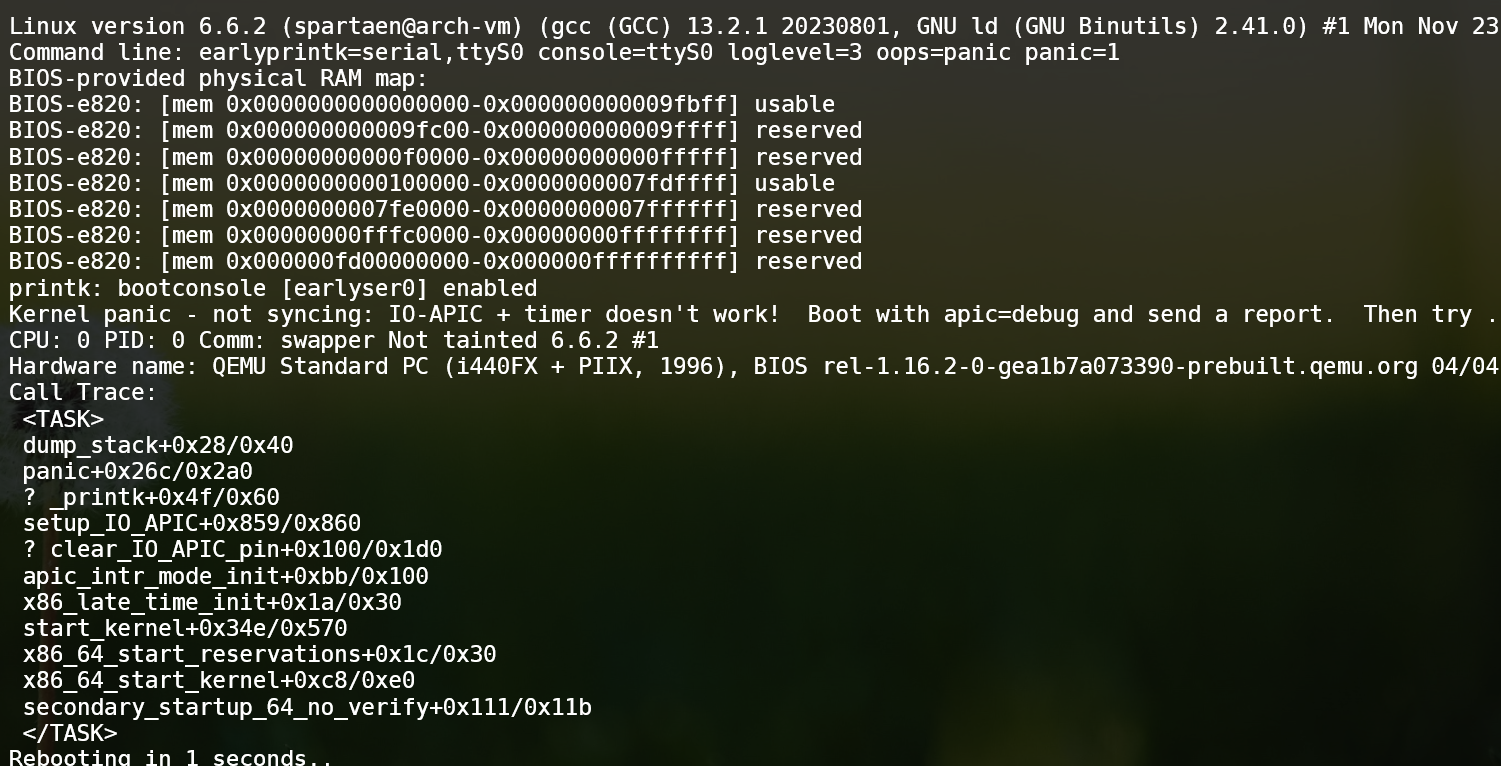
不用担心,正常现象,因为我们的时钟中断被拦截了,导致了 kernel panic。

我们继续编辑 run.sh,删除掉 -no-reboot 这个参数,继续启动,发现他陷入了重启循环,这时候我们启动客户端:

1
py client.py
1
2
3
4
5
(intsvc)> ver
Version: 0
(intsvc)> ping
pong
(intsvc)>

可以拿到服务器的正常响应,我们看一下开关状态:

1
2
3
4
5
6
(intsvc)> status
Intercept timer INT: off
GSI(passthrough):
None
HW_EDU(passthrough):
None

没有拦截时钟中断,但也没允许 GSI 通过任何中断,EDU 设备也不允许通过中断。我们看一下计数器:

1
2
3
4
5
6
7
8
(intsvc)> stats
Interrupts on Chip: 8747
Interrupts Inside CPU: 156
(intsvc)> ls
Interrupts:
GSI(0):0 - 8592
GSI(0):4 - 54
GSI(0):8 - 407

GSI 上拦截到的 0、4、8 号中断中,0 号特别多,我们放行一下 0 号中断:

1
2
(intsvc)> set-int 0 0 0
Interrupt GSI:0 switched off.

发现画面卡在这里不动了,我们放行一下 4 号中断。

1
2
(intsvc)> send 0 4
OK

会发现我们完成输入后,放行中断后中断就会突然跳出一堆字,十分有趣。

老样子让我们试试 edu 设备,先放行其他中断:

1
2
3
4
(intsvc)> set-int 0 4 0
Interrupt GSI:4 switched off.
(intsvc)> set-int 0 8 0
Interrupt GSI:8 switched off.

然后我们算个阶乘:

1
~ # edu f 5

发现他卡住了,我们看一下拦截记录,尝试放行:

1
2
3
4
5
6
7
8
9
10
11
12
(intsvc)> ls
Interrupts:
GSI(0):0 - 11249
HW_EDU(3):0 - 1
(intsvc)> send 3 0
OK
(intsvc)> ls
Interrupts:
GSI(0):0 - 11249
GSI(0):11 - 1
(intsvc)> send 0 11
OK

首先是 EDU 设备拦截到了,我们放行后,中断号被转换为 11 出现在了 gsi,再次被拦截,再度放行后,我们的终端输出了阶乘结果:

1
2
~ # edu f 5
Result: 120

十分好玩

附件

直接打包了:intsvc.zip

小结

当时做这个东西真是费了不少功夫,除去上课断断续续做了一个星期吧(其实是一个星期多一点)。绝大多数时间都在分析中断的传播,想方设法证明是否能在那几个中断控制器上拦截所有外设中断。

实际上我也不是特别明白做中断拦截的 point 在哪里(不过测试驱动还蛮舒服的感觉),但对一个大项目动刀我还是满喜欢的,我就单纯想挑战一下。